
How to hang your grab & go garland
-
Step 1: Set Your Anchor Point
If you’re attaching to an existing structure (banister, railing, pole):
Use the included stretch tie to wrap around the garland’s centerline, loop it through your anchor point, and knot securely.If you’re hanging on a wall:
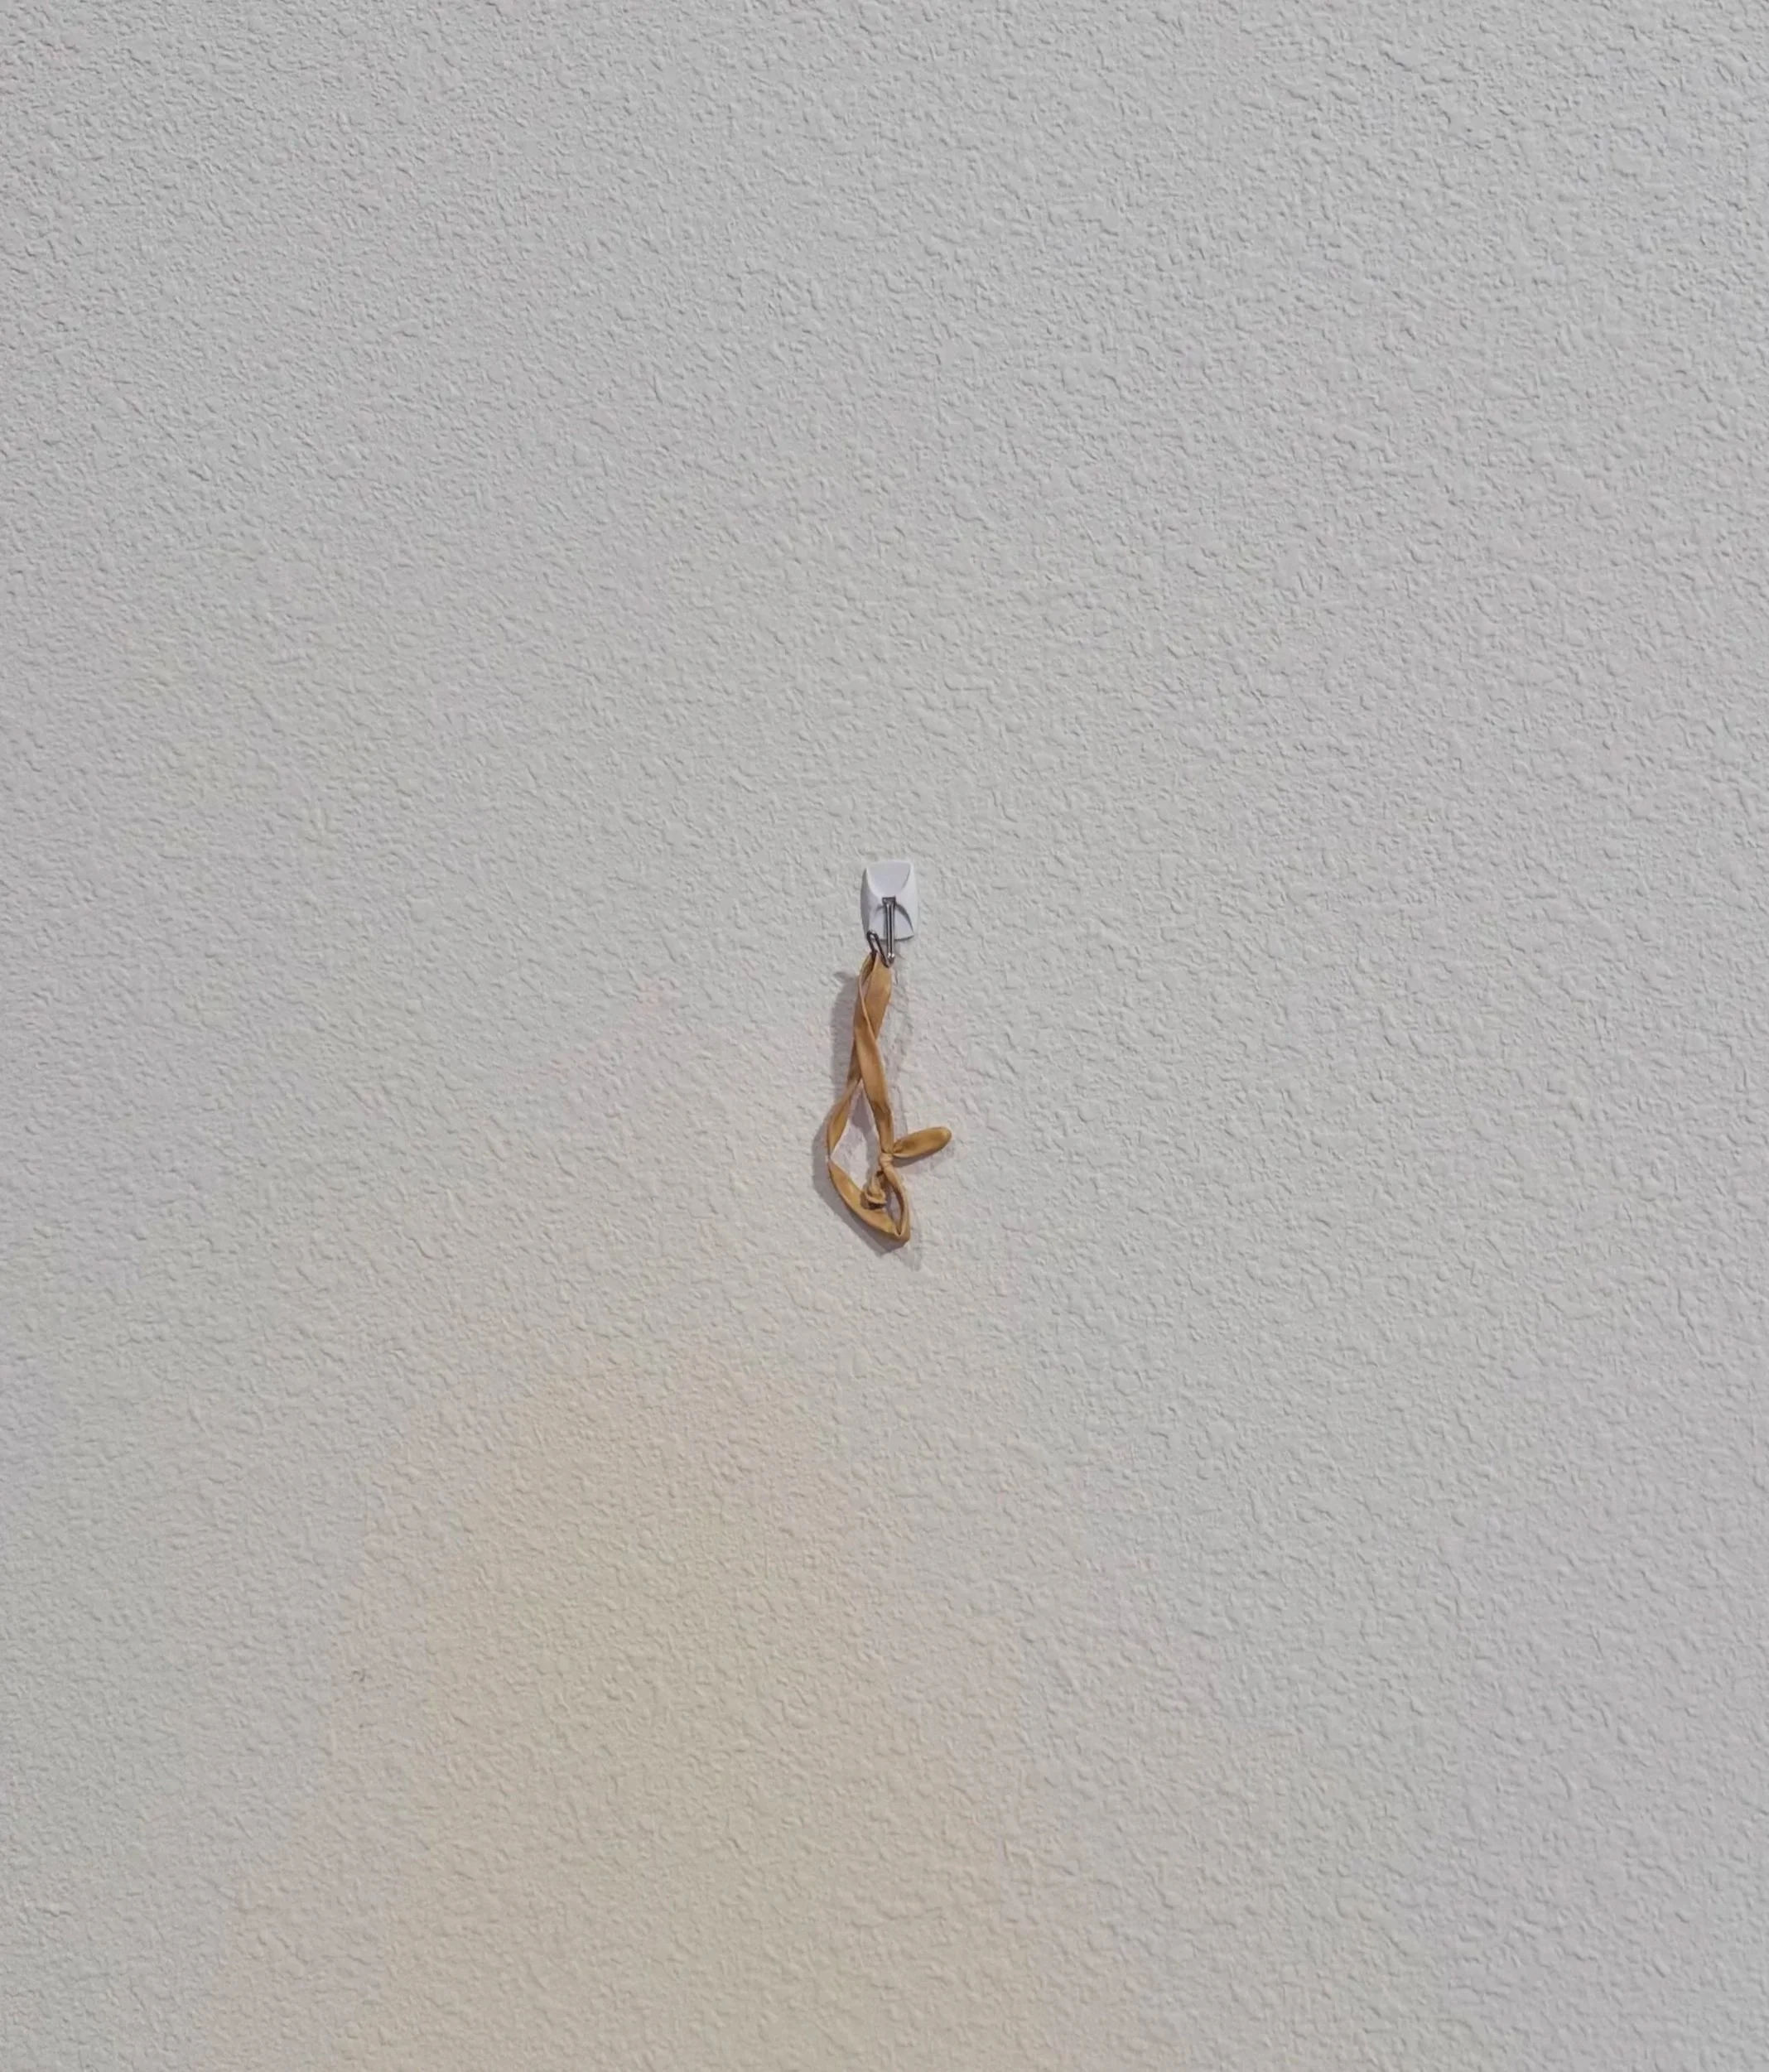
Apply the provided Command Hook(s) to create a clean anchor point. Attach the balloon bracelet to the hook so the garland has a stable place to begin.Tip: Allow the hook to adhere for about 10 minutes before hanging for the most secure hold.
-
Step 2: Position the Garland
Hold the garland in position and take a moment to align it exactly where you want the focal point to land, whether that’s above a backdrop, along a wall, or framing an entry.
-
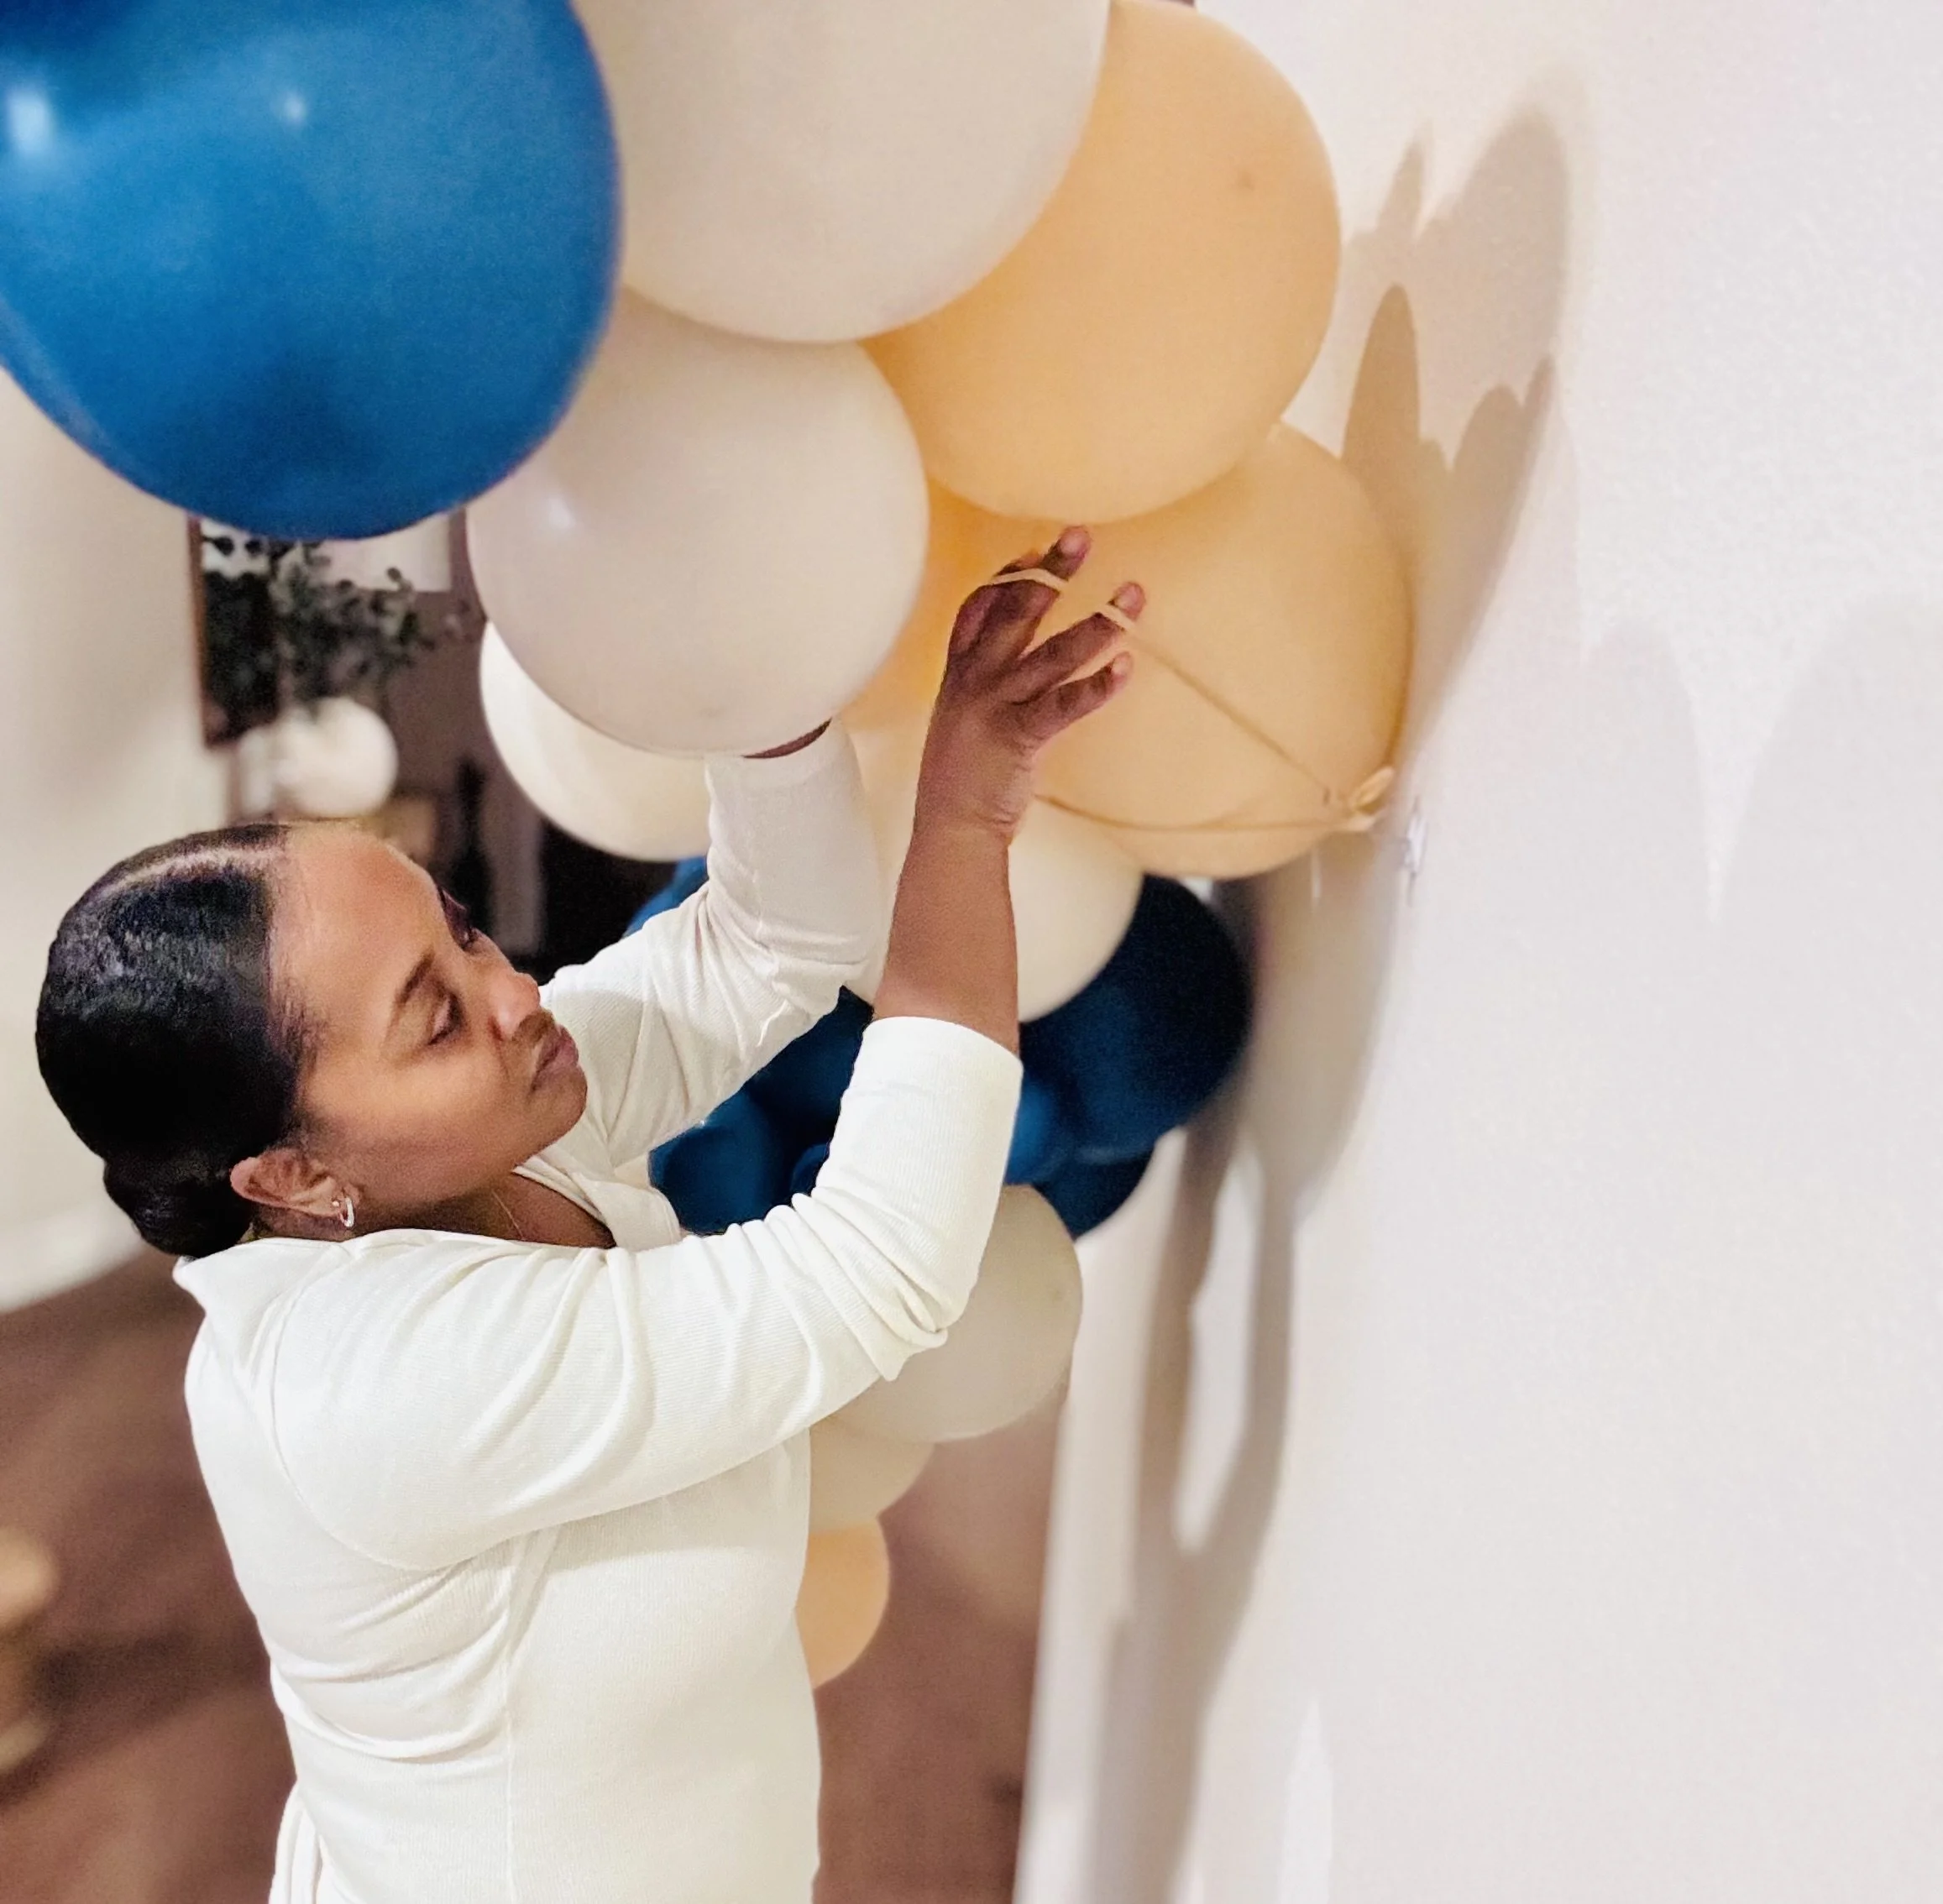
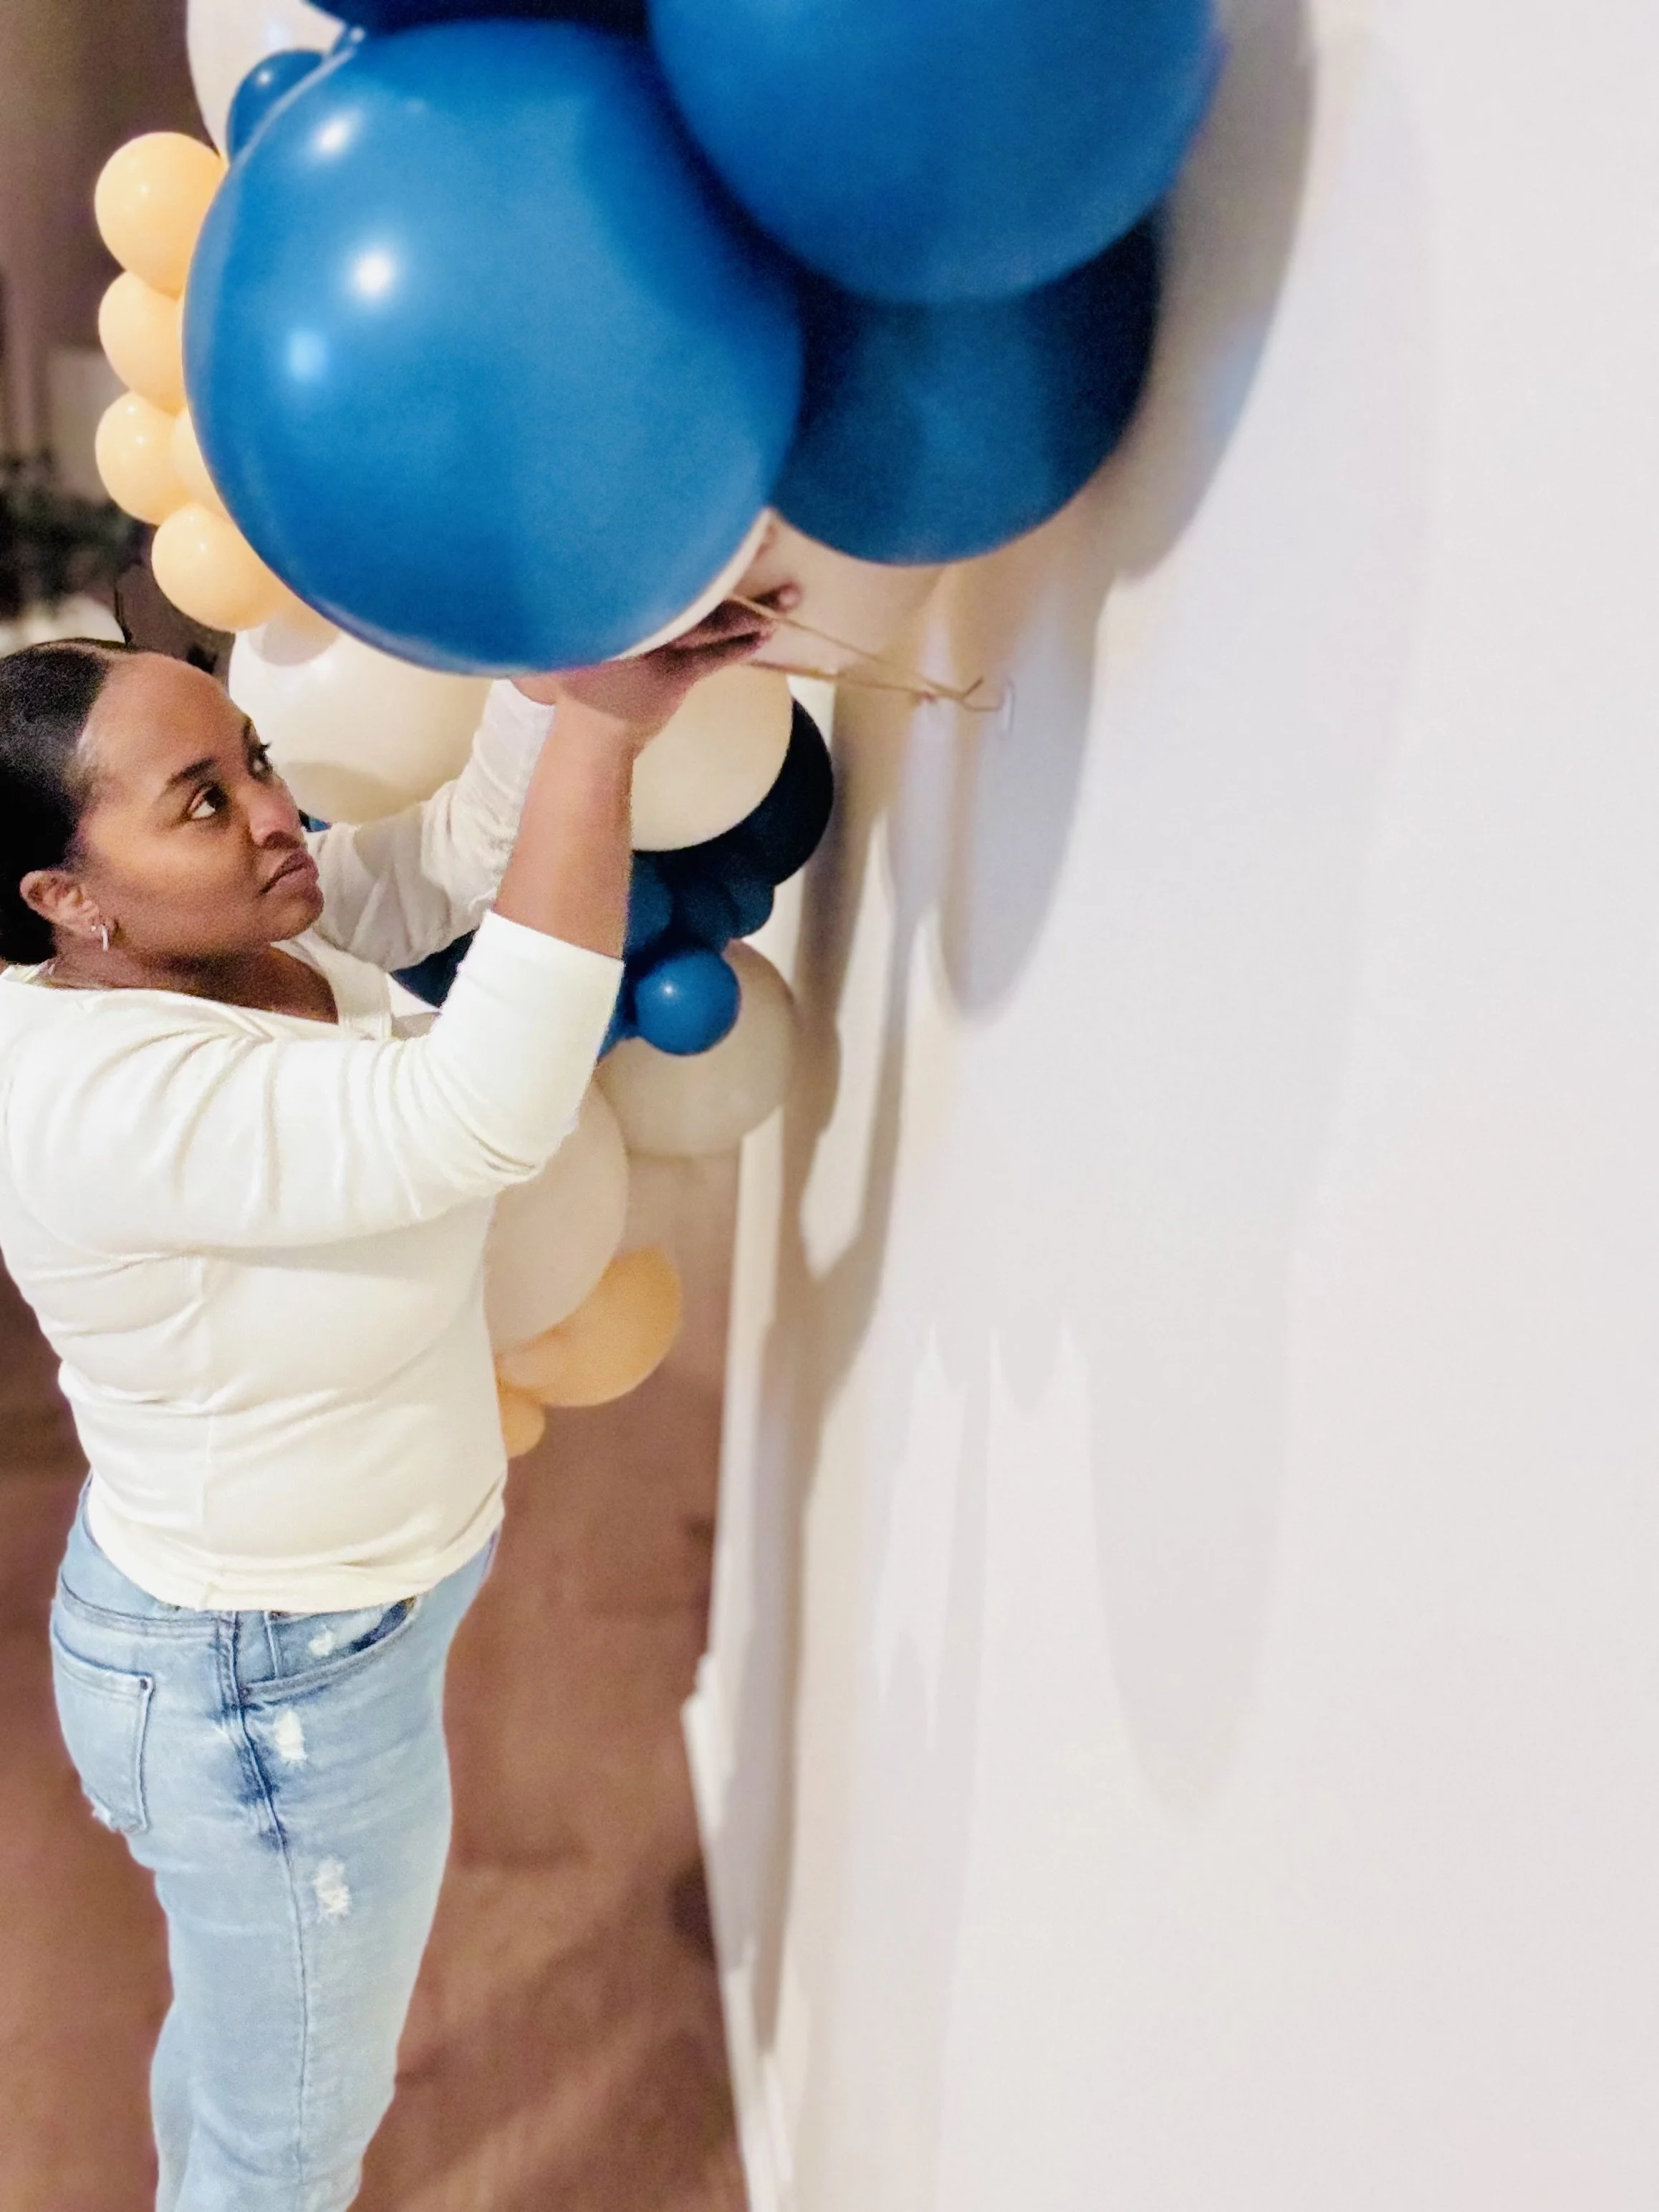
Step 3: Secure & Support
Stretch the balloon bracelet toward the nearest balloon and loop it into place to hold the garland securely.
For longer designs, add additional tie points along the length to keep everything balanced and polished.
A second set of hands helps, but it’s absolutely doable on your own.
-
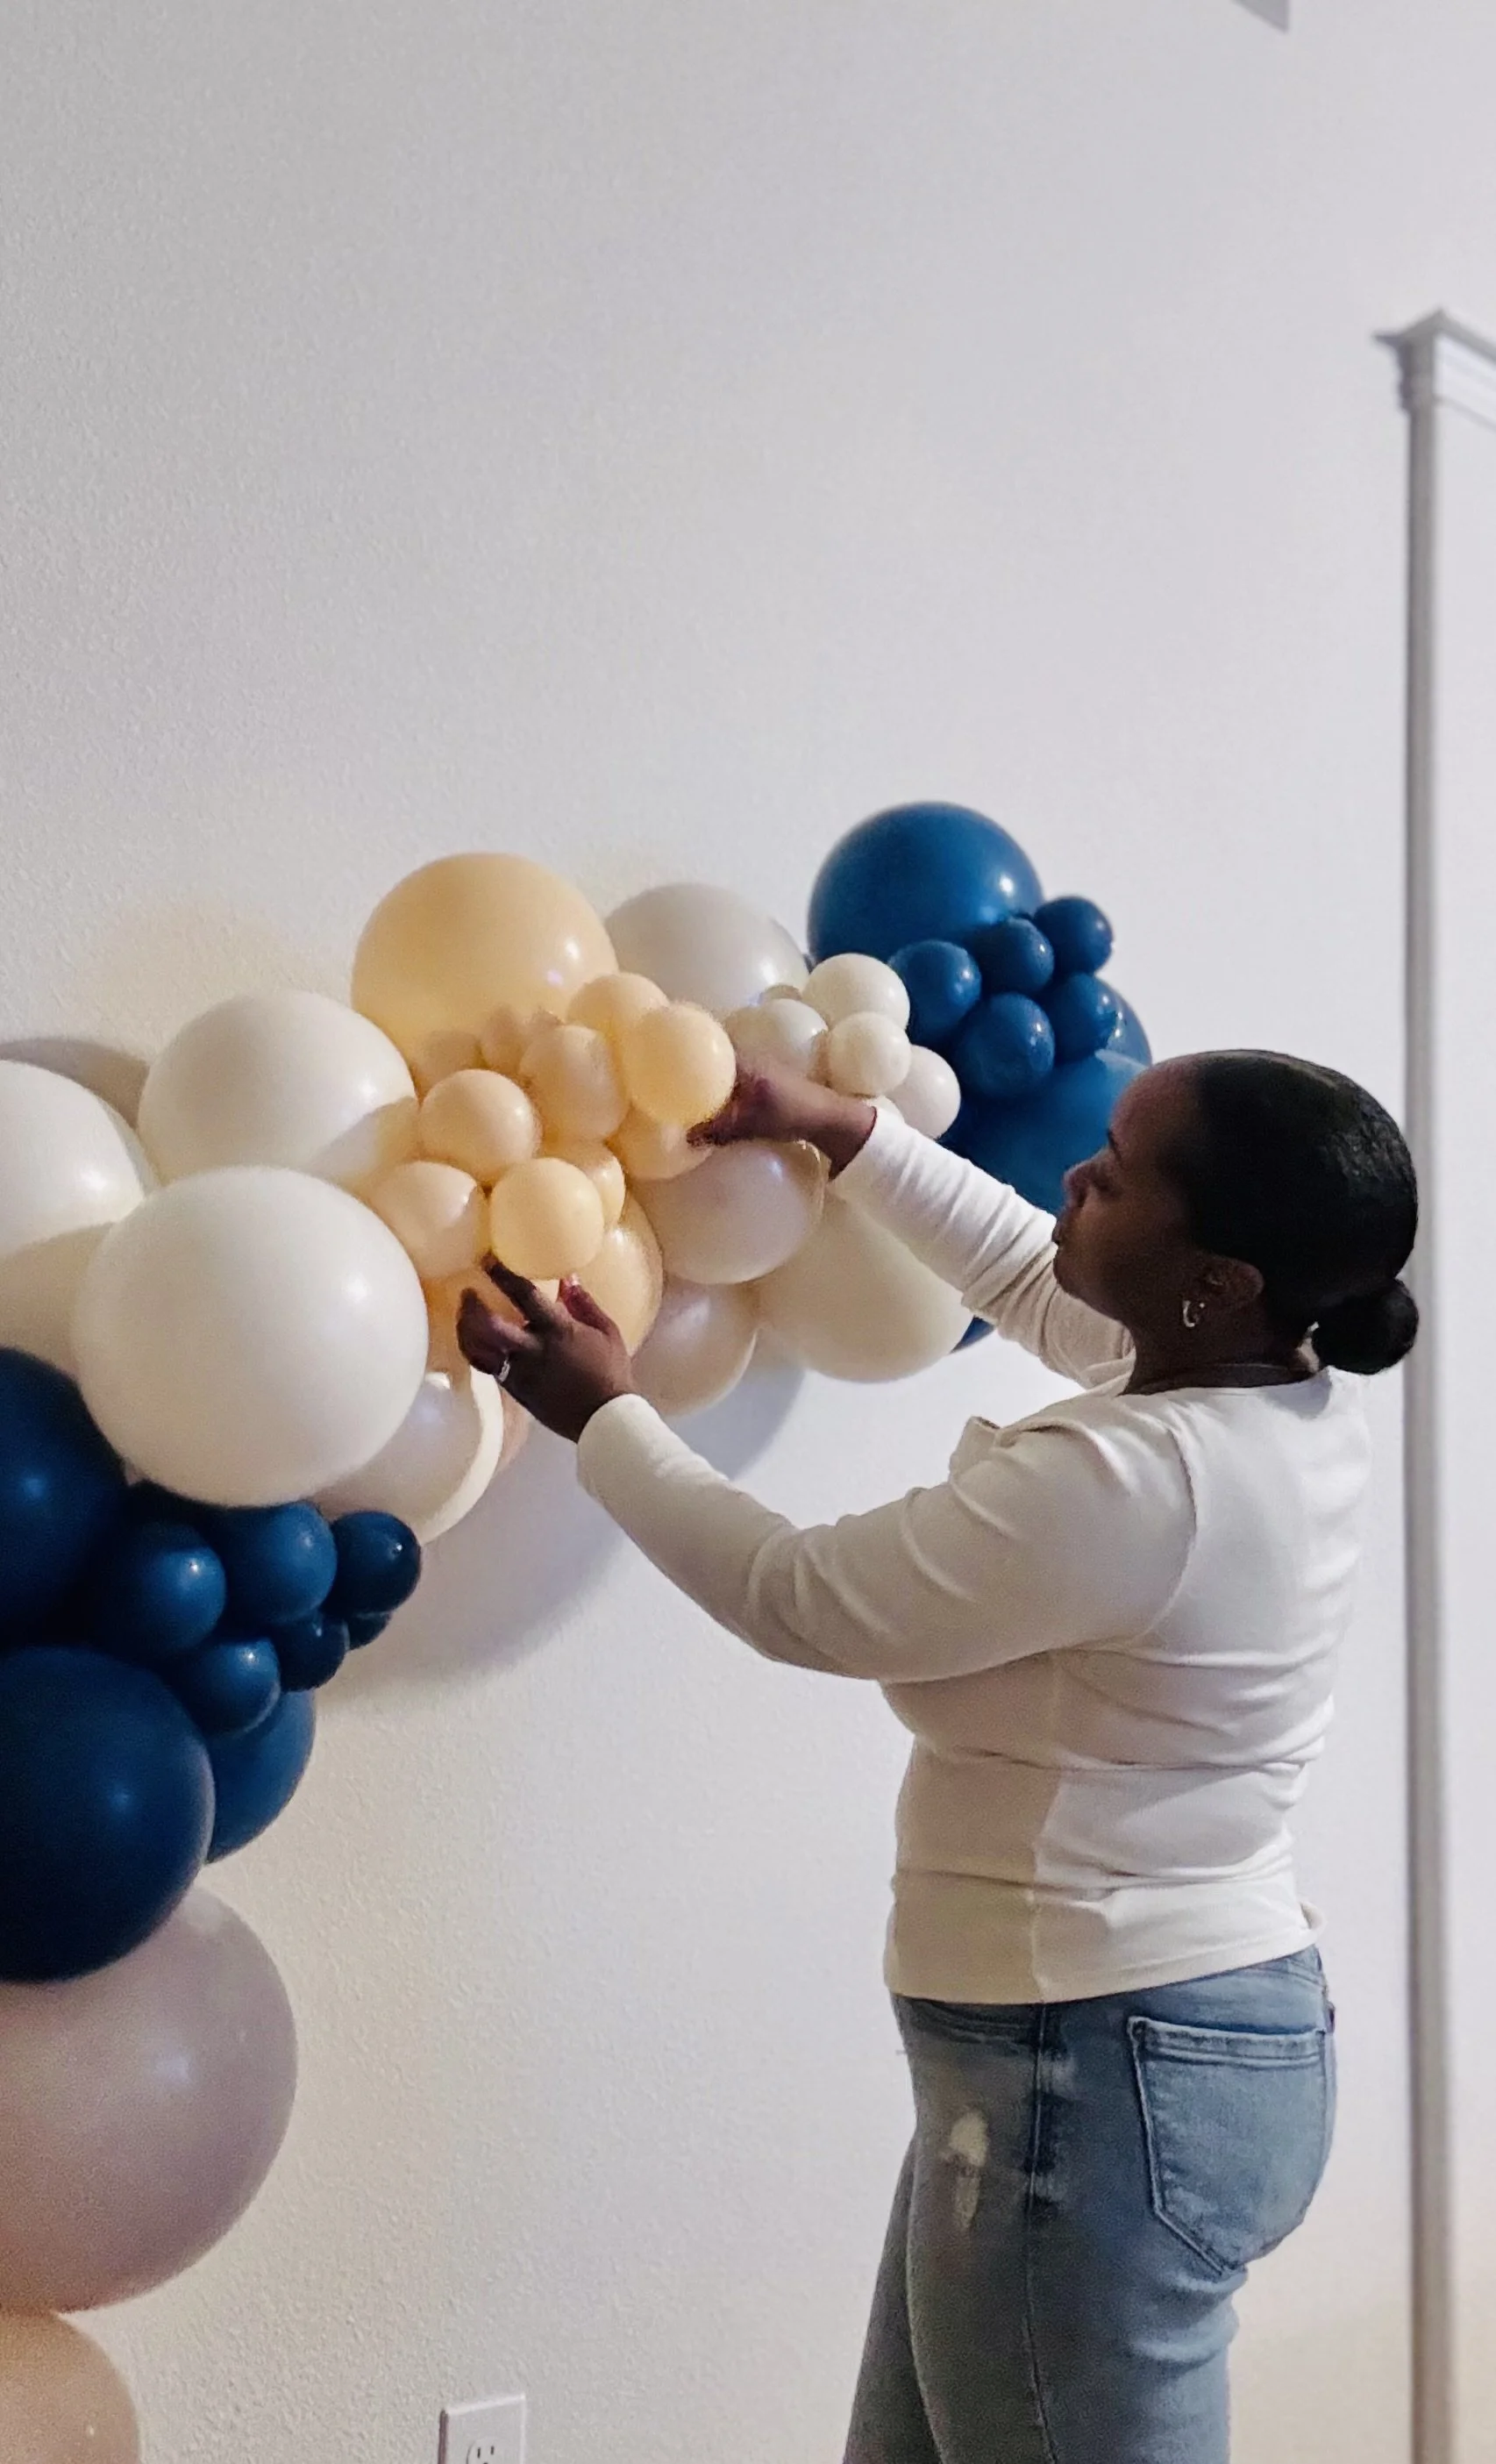
Step 4: Shape, Refine & Style
Once it’s hanging, gently adjust the smaller balloons forward to add depth and fullness.
A few subtle shifts make all the difference and bring the design to life.Step back, refine the shape, and enjoy your finished moment.